
4.5 Blogging For SEO
A typical work day scene; Photo by Tiffany Davidson
Blogging is the most important thing you can do for your website. But not just any blogging, seo blogging.
In Lesson 3.5 I taught you how to generate blog post topics for SEO using your keyword research.
Now I’m going to show you how to structure a blog post and implement SEO into each blog post.
Basically, this lesson is about on-page SEO for blog posts. This is a really important lesson, so let’s jump in!
How To SEO A Blog Post Before Publishing:
Keyword research
Each blog post you create will have a specific keyword you’re targeting. We’ve already covered the details of this in Lesson 3.5, as I showed you how to generate blog post topics using your keyword research, and how to create a list of titles and URLs to be used for each blog post.
Each blog post will be focusing on a particular keyword, and it is our job to implement that keyword into the post in as many ways as we can, so that we communicate clearly with search engine robots, letting them know, “my article is a great result for this search query!”
Pulling from my list of blog post topics on my example site— California Clicks— I’m going to use the title “Planning Your Big Sur Destination Wedding,” which is targeting the keyword big sur destination wedding, as an example throughout this lesson.
Title & tags
The first thing you want to do with a brand new blog post is input the title and add your keyword as a tag. Both of these steps take place in the Content tab of a new blog post pop-up window.*
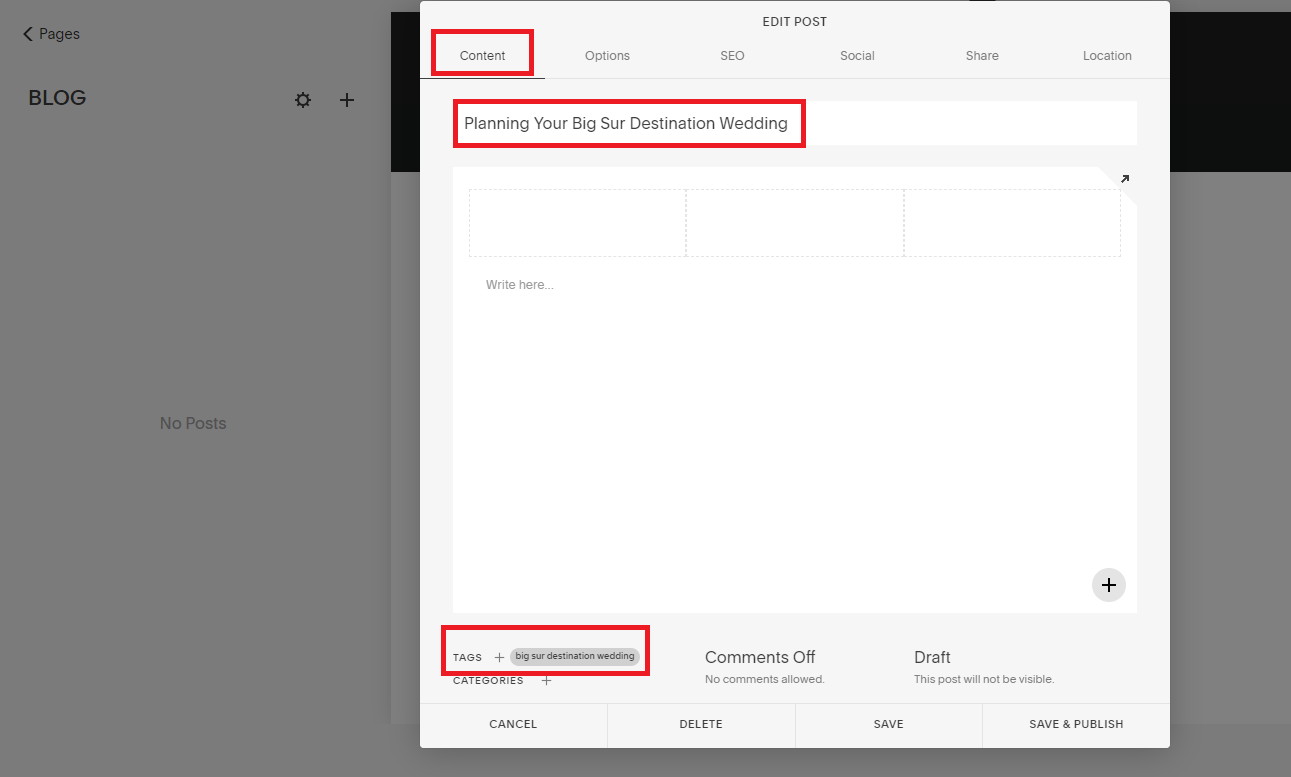
(I also go ahead and add three Spacers in the main blog post area, and suggest you do the same. I’ll show you why I do this in the video for this lesson).
*Version 7.1 update: Skip this step for Squarespace version 7.1 sites as the layout has changed. Instead, move right on to… ⤵
Thumbnail Image & URL
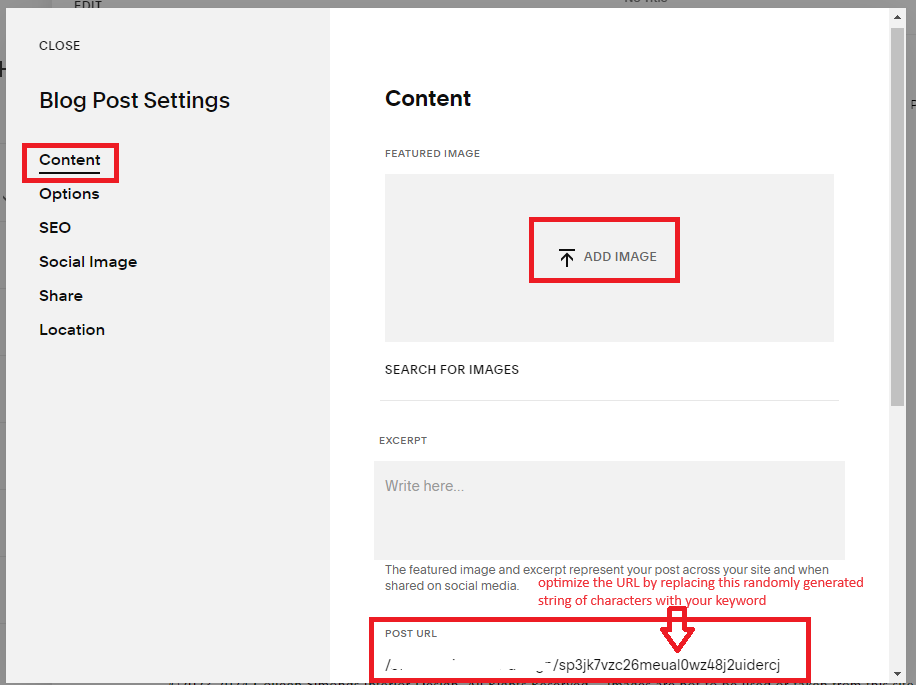
Next, click on the Options tab.*
In the Post URL field, enter your keyword as the URL. Remove any dates from the URL. Search engines prefer short to-the-point URLs.
Then, upload your thumbnail image. Before doing so, be sure to optimize the image according to the instructions in Lesson 4.2. Here is the difference: rather than adding any random keywords to the filename, you want to use your blog post title as the filename. So, in our example, I would name my thumbnail image: Planning Your Big Sur Wedding.png (or .jpg, etc.).
Be sure to click Save.
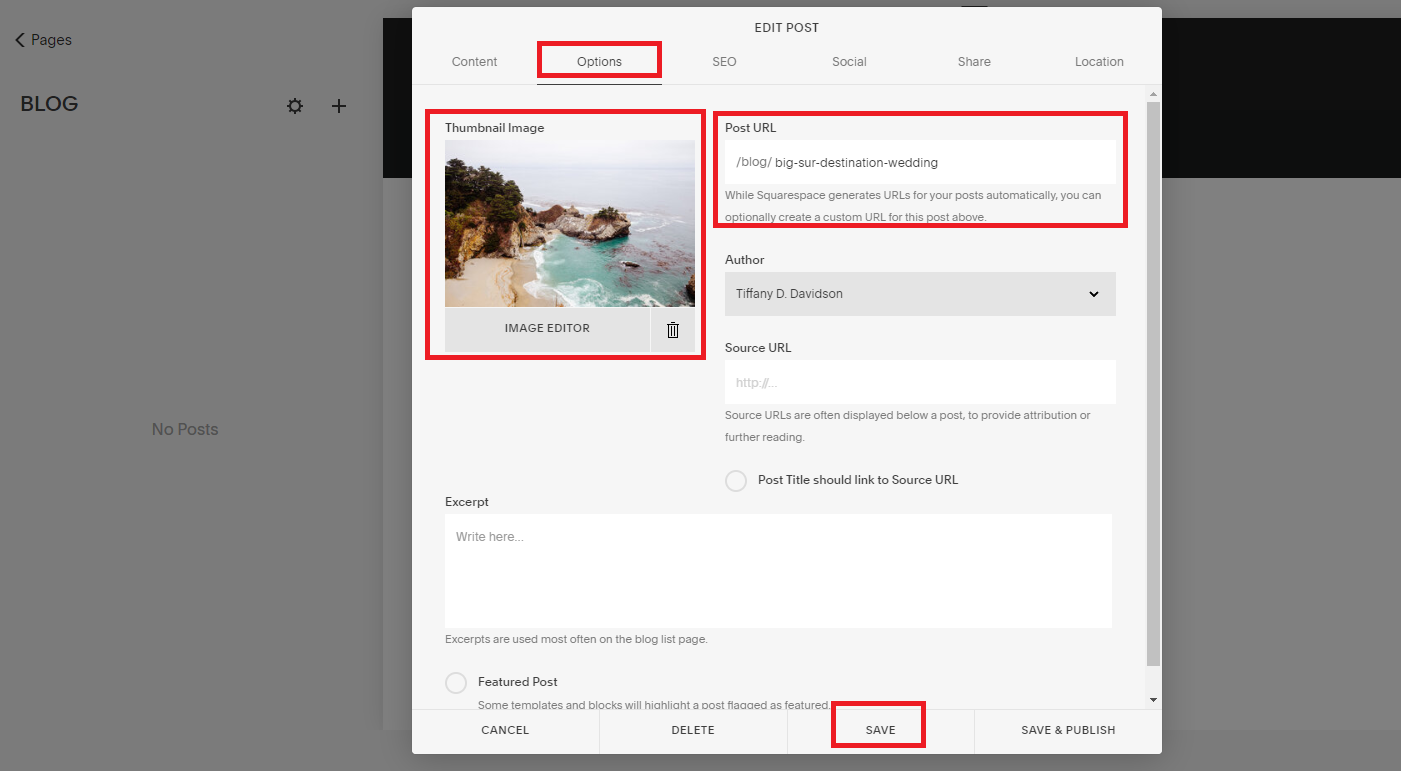
version 7.0 layout
*Version 7.1 update: changing the thumbnail and URL is slightly different with version 7.1 sites —> just go to Settings of the new blog post, then in the Content tab you will see where to upload your [optimized] thumbnail for the blog post, and where to update the Post URL.
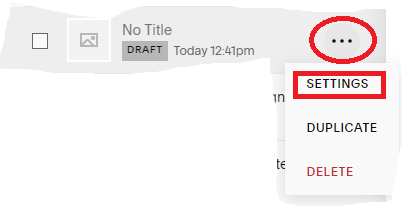
version 7.1 layout
version 7.1 layout
Now it’s time to build out the blog post itself!
Structuring a blog post is very similar to structuring all other pages on your site, and the same on-page SEO techniques we’ve already discussed apply here too:
try to include keywords in headers
A good blog post usually has a layout similar to the following:
intro
body of the post separated by sections (using headers)
some image files throughout the post
conclusion with a call to action
To understand what I mean by different sections that use headers, browse articles around the Internet and notice how the post is broken up with different headers. Almost like chapters of the blog post. Even this lesson is broken up using header font format.
When creating blog posts, be sure to strategically add keywords if you can to those headers, just like you learned in Lesson 4.3.
Optimize Image files
In Lesson 4.2 you learned how to optimize image files before and after uploading to your site.
You want to employ the same techniques in blog posts as well, but there is one major difference with the filename and caption:
use the blog post title or keyword for the filename and caption, not your site meta title description and all keywords.
So, for my “Planning Your Big Sur Destination Wedding” post, my image file optimization looks like this:
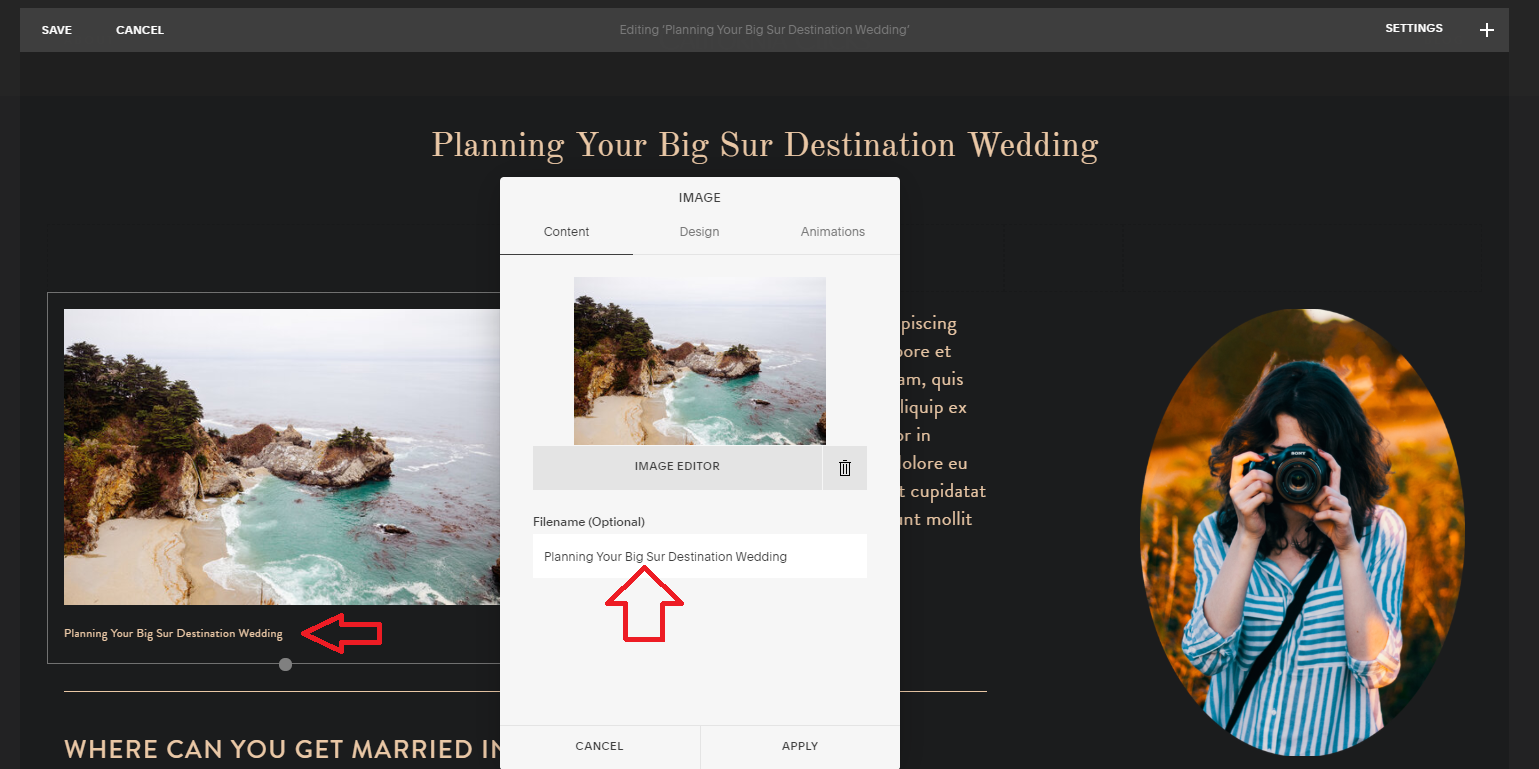
This will help the specific post rank better, so that when someone types in that keyword, your blog post pops up as a direct response, rather than a more general HOME or ABOUT page.
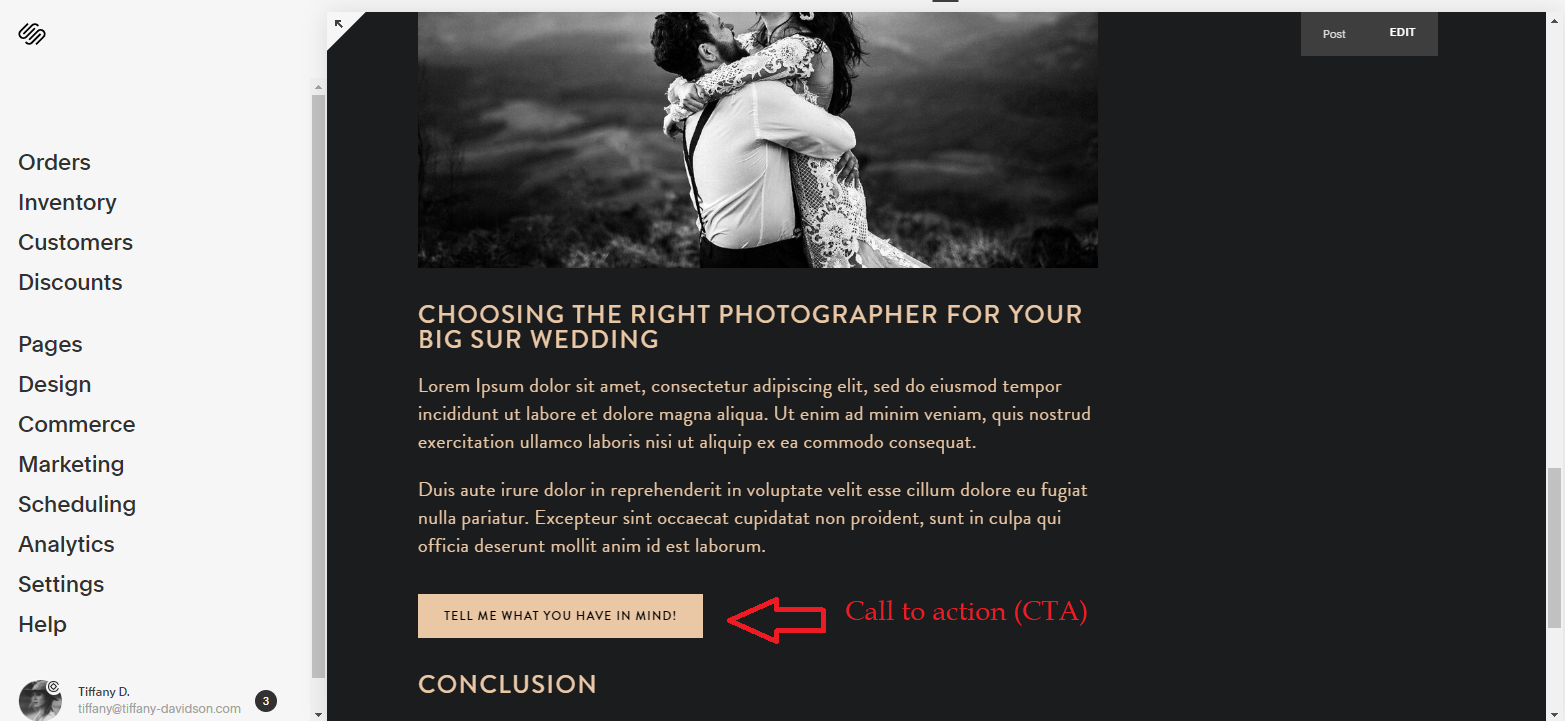
add call to actions
Throughout the post, be sure to include a couple of call to actions.
Whether it’s pointing to another blog post of yours, adding related posts, directing the reader to your Portfolio or Services page, or suggesting they get in touch with you (via something like a button), all of your blog posts should contain call to actions.
Rather than hoping the person will understand how you can help them and will seek you out, add value by letting them know how you can help them and what they need to do to initiate that.
Now it’s time for a video lesson to go over everything in a bit more detail, visually.

Welcome to Squarespace SEO Expert! In this course I'm going to teach you the exact process I use to rank Squarespace websites on Google Page 1, using no paid advertising, only organic SEO techniques. If at any point you have questions, please use the comment feature at the bottom of the particular lesson you have a question about. I'm happy to help!

-
1. Introduction
- Mar 2, 2020 1.1 Welcome!
- Feb 3, 2020 1.2 What Is SEO? Why Is It Important?
-
2. Anwering Questions
- Jan 3, 2020 2.1 Necessary Initial Questions
-
3. Keyword Research
- Dec 3, 2019 3.1 Discover What Your Target Audience Is Searching For
- Nov 3, 2019 3.2 Using Suggested Keywords
- Oct 3, 2019 3.3 Keyword Planner Tool
- Sep 3, 2019 3.4 High-Intent Keywords
- Aug 3, 2019 3.5 Generating Blog Post Topics
- Jul 3, 2019 3.6 Site Meta Title & Description
-
4. Applying On-Site SEO
- Jun 3, 2019 4.1 SEO Title and Description Fields
- May 3, 2019 4.2 Optimizing Image Files Before & After Uploading
- Apr 3, 2019 4.3 On-Page SEO
- Mar 3, 2019 4.4 Understanding The Sitemap
- Feb 3, 2019 4.5 Blogging For SEO
-
5. Moving Forward
- Jan 3, 2019 5.1 Using Google Search Console
- Dec 3, 2018 5.2 Consistent SEO Blogging
- Nov 3, 2018 5.3 Adding New Content
- Oct 3, 2018 5.4 Epilogue
Copyright
© 2020-2024, All Rights Reserved
All content in this course is created and owned by me and cannot be used or sold elsewhere. Thank you for appreciating and valuing my work and experience.